
How to create and configure workspaces
Group your apps into workspaces (Work, Personal, a client, a project) and set icons, work hours, notifications and profiles for each one.
A workspace is a group of apps that belong together. You could have a "Work" workspace with Slack, Gmail and Jira, and a "Personal" one with WhatsApp and your personal email. Each workspace has its own icon, name and settings, so you can, for example, mute every work app in one click or only get work notifications during office hours.
In Rambox 3, every app lives inside a workspace, and all workspaces sit at the same level in the sidebar (workspaces can no longer be nested inside other workspaces).
Workspaces on the Basic plan
The Basic plan includes one workspace. Creating more is a Pro feature, available on the Pro plan and during the free trial. If you are on Basic and already have more than one, the extra workspaces stay visible but locked. How to become Pro · What happens to my workspaces on Basic?
Where workspaces live
Workspaces are listed in the sidebar. With the default Compact layout, the workspaces are at the top of the sidebar and, below a dividing line, you see the apps of the workspace you are in. With the Split layout, workspaces and apps sit in two separate bars. You can change the layout and the side of the window the sidebar sits on in Settings → Appearance. See Getting around Rambox for a full tour of the sidebar.

If you don't have any workspace yet, the sidebar says No workspaces yet and the main area invites you to Create your first workspace!
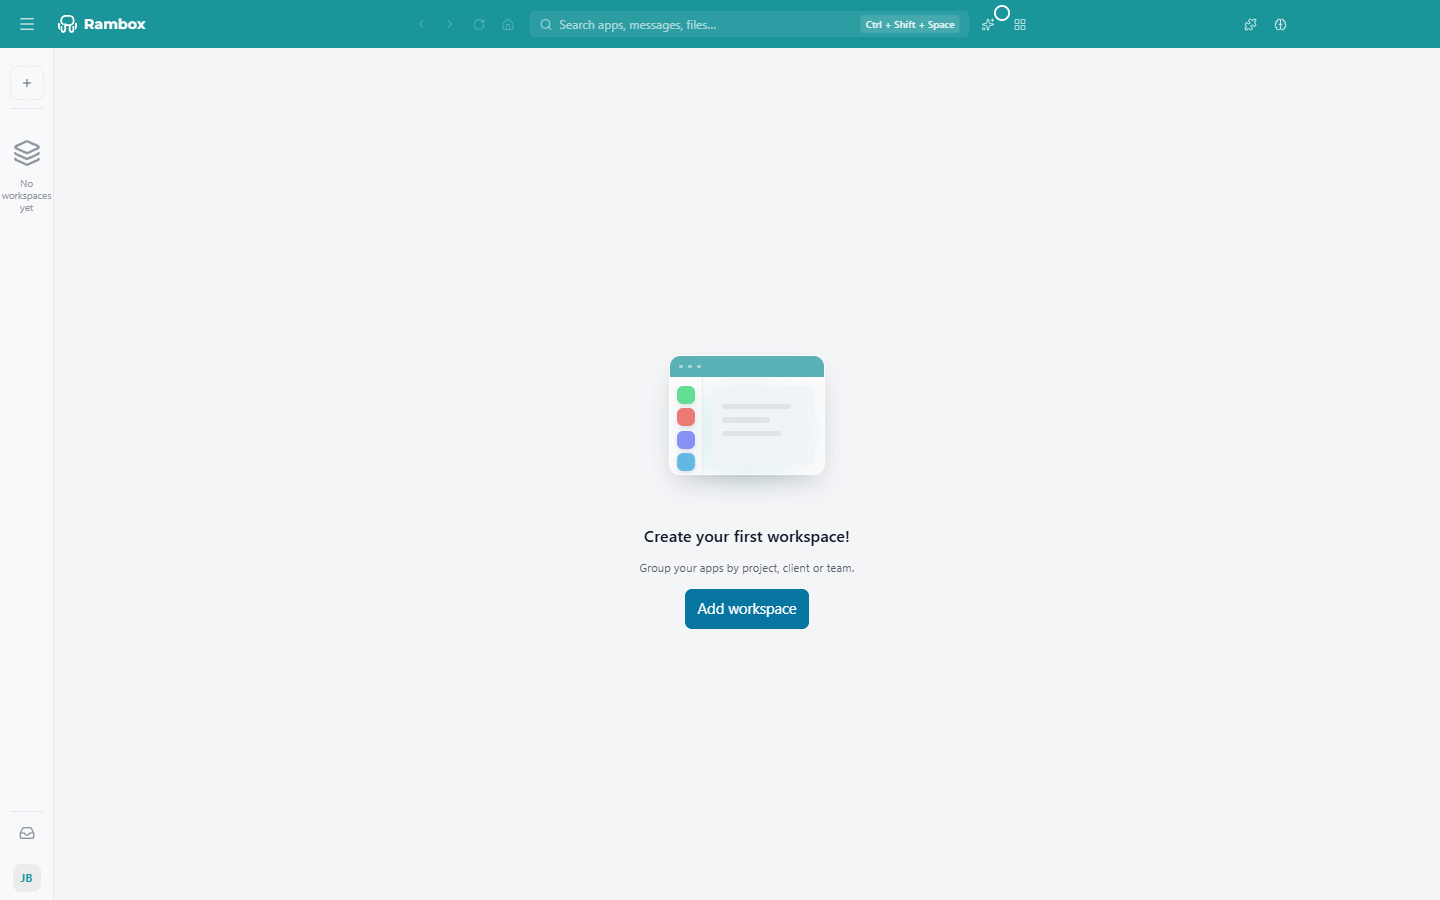
Create a workspace
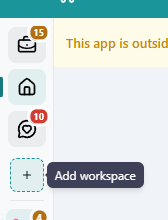
- In the sidebar, click the + button with the tooltip Add workspace.
- If the sidebar is collapsed (icons only), the + is right below your list of workspaces.
- If the sidebar is expanded (with names), the + is next to the Workspaces header.
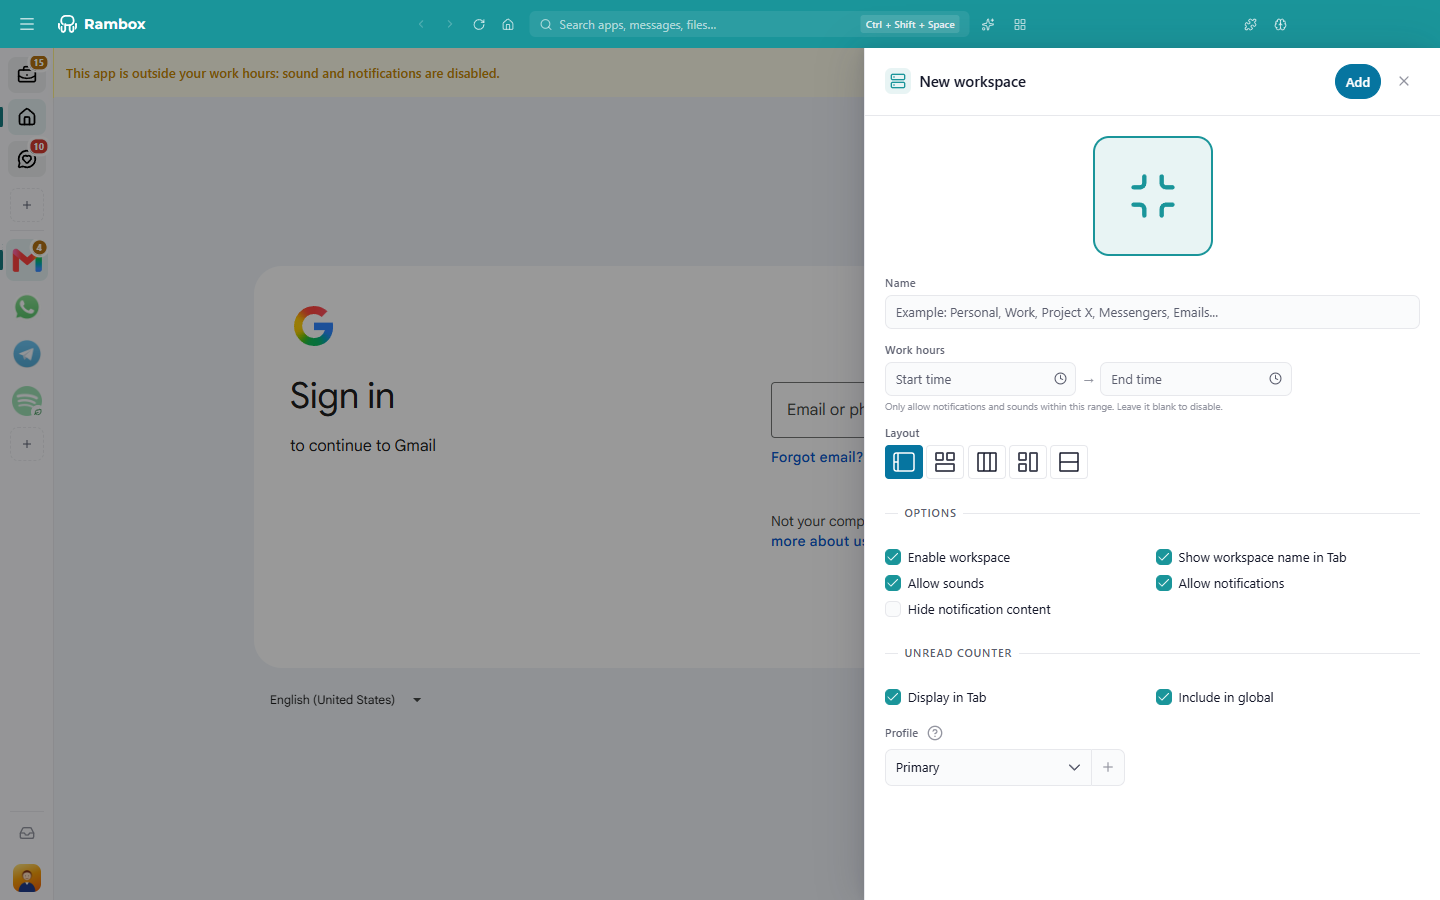
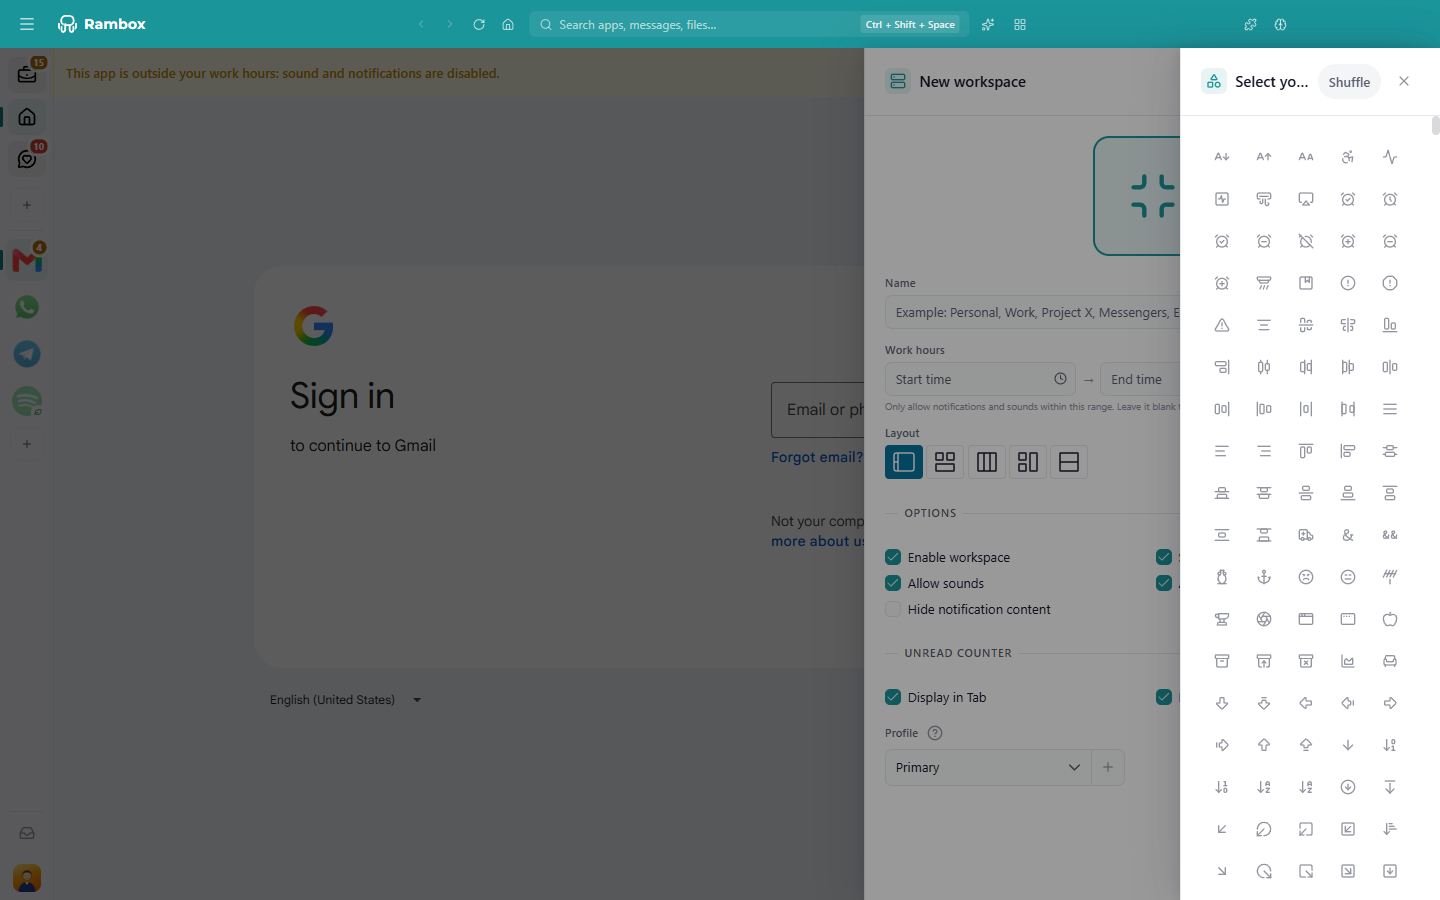
- The New workspace panel opens on the right.
- Type a Name for the workspace. This is the only required field.
- Optionally, change the icon, set work hours, choose a layout and adjust the options described below.
- Click Add at the top of the panel (or press Enter while you are in the Name field).
Your new workspace appears in the sidebar and Rambox shows Cool! You added a new workspace! Now it's time to add some apps to it: see How to create and configure apps.
To close the panel without creating anything, click ✕ or press Esc.
On Basic
If you are on the Basic plan and already have your one included workspace, the + button shows a PRO ribbon. Clicking it takes you to the billing page instead of opening the form.
Edit an existing workspace
- Right-click the workspace in the sidebar.
- In the small menu that opens, click the gear icon (Settings).
- The Edit workspace panel opens. Change what you need and click Save.
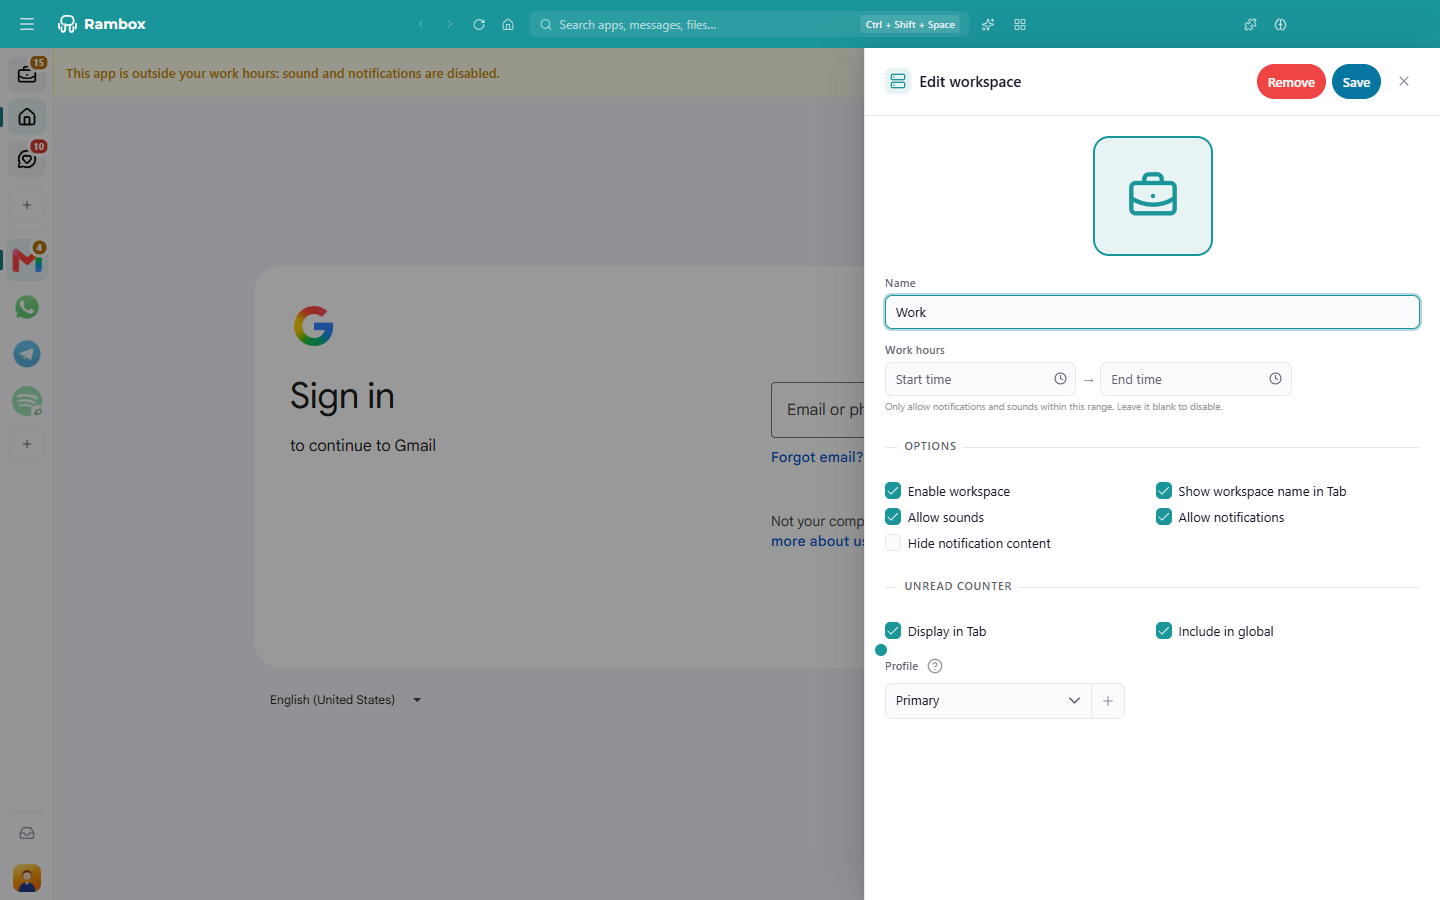
The right-click menu also has quick switches to turn the workspace, its sounds and its notifications on or off. See Apps and workspaces quick settings.
Workspace settings, one by one
Icon
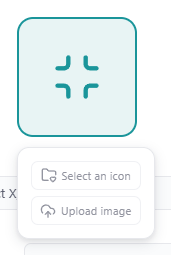
Click the big icon at the top of the panel (tooltip Click here to change the icon). You get two choices:
- Select an icon: opens Select your desired icon, a gallery of icons to pick from. Click Shuffle to see a different selection.
- Upload image: pick any image file from your computer. Rambox crops it to a centered square and resizes it for you, so you don't need to prepare it first.
When you use your own image, two small buttons appear under it: one to replace the image and one (trash can) to delete it.
New workspaces get a random icon, so you can skip this step and change it later. More details in How to change the icon image.
Name
The name shown in the sidebar. For example: Personal, Work, Project X, Messengers, Emails. It can't be empty.
Work hours
Two time pickers, Start time and End time. When you set them, the apps in this workspace only play sounds and show notifications within that range. Outside it, they stay quiet. Leave both blank to turn the feature off (the default).
This has its own article with all the details: Work hours.
Layout
Only shown when you create a workspace. It decides how the workspace shows its apps:
- The first option (the default) is a normal workspace that shows one app at a time, with the app icons in the sidebar.
- The other four options are Tiles layouts: the workspace is split into panes so you can see several apps side by side.
WARNING
The layout can't be changed after the workspace is created. If you change your mind, create a new workspace with the layout you want.
Learn more in Tiles: workspace layout.

Options
| Option | What it does | Default |
|---|---|---|
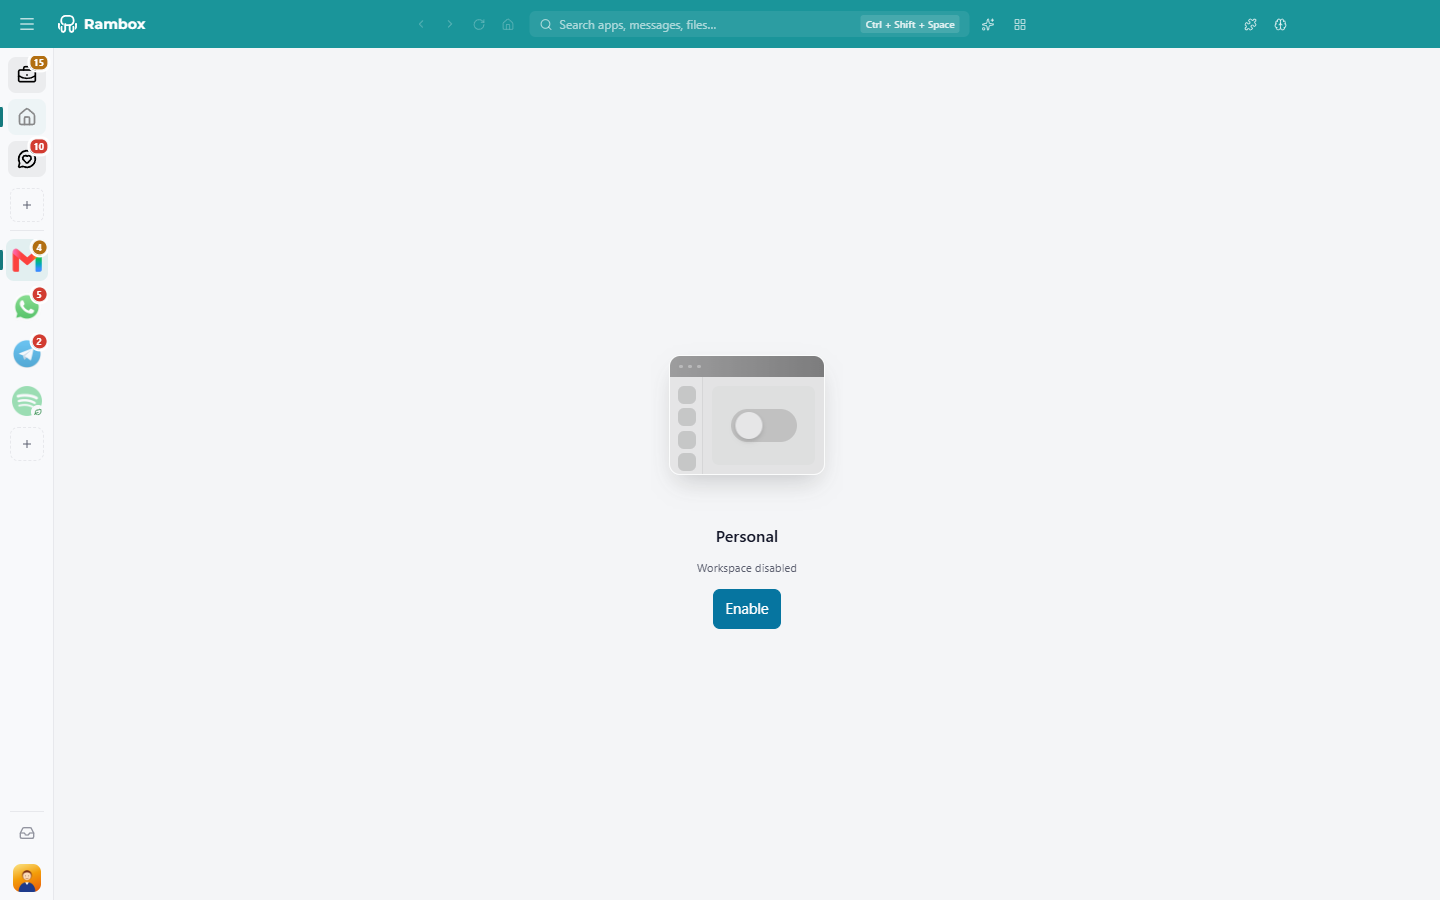
| Enable workspace | When off, none of the workspace's apps load, so they use no memory and send no notifications. The workspace stays in the sidebar, greyed out. If you click it, Rambox shows Workspace disabled with an Enable button to turn it back on. | On |
| Show workspace name in Tab | Shows the workspace name under its icon. It only has an effect when the sidebar sits at the top or bottom of the window (on the left or right, names are never shown under icons). | On |
| Allow sounds | When off, every app in the workspace is muted. | On |
| Allow notifications | When off, no app in the workspace shows notifications. | On |
| Hide notification content | Notifications from this workspace's apps say "You have a new notification" instead of showing the message. Useful if you share your screen or work in public places. | Off |
Allow sounds and Allow notifications work together with each app's own settings: an app only plays sounds or shows notifications when both the workspace and the app allow it.
Unread counter
| Option | What it does | Default |
|---|---|---|
| Display in Tab | Shows a badge on the workspace in the sidebar with the total unread count of its apps. | On |
| Include in global | Adds this workspace's unread count to the global counter on the Rambox icon in your taskbar, Dock or system tray. | On |
Each app can also leave itself out of the workspace total with its own Include in workspace option. See Dot and leaf indicators for what the badges look like.
Profile
A profile is the browser session your apps sign in with. The workspace profile is the starting point for its apps: every app you add to this workspace starts with this profile (as Inherit from Workspace), and you can still give any single app a different one.
The options are:
- Primary: the default shared session.
- Private: each app in the workspace gets its own separate session.
- Incognito: nothing is saved; you have to sign in again every time.
- Any custom profile you created.
The + button next to the field opens the Profiles panel, where you create and manage profiles. Everything about profiles is in Profiles and session management.
On Basic
On the Basic plan, every app always gets its own isolated session, so the workspace profile has no effect.
Reorder workspaces
Drag a workspace up or down in the sidebar. Hold the mouse button for a moment before you start dragging (this avoids accidental moves). The new order is saved to your account and shows on all your computers.
If you have more workspaces than fit in the sidebar, the rest go into a … menu (More workspaces). Hover over it to see them; you can reorder them inside that menu too.
Tips
- Switch workspaces quickly: click a workspace, use Ctrl+Alt+1…9 (macOS: ⌘+⌥+1…9) to jump to a specific one, or type its name in the Command Center. All shortcuts are in Keyboard shortcuts.
- Move an app to another workspace by dragging it onto the workspace in the sidebar. See How to move apps to a workspace.
- Coming from Rambox 2? Nested workspaces were moved to the top level when you upgraded, and apps that were outside any workspace now live in a workspace called Root Apps. See Upgrading from Rambox 2.