
Tiles: workspace layout
Split a workspace into tiles to keep several apps on screen at once, side by side or stacked.
A normal workspace shows one app at a time. A Tiles workspace splits the window into panes ("tiles"), each with its own app, so you can follow several apps at a glance: your team chat next to your calendar, or three inboxes side by side. You can split any tile again to the right or downward, and resize tiles by dragging the lines between them.
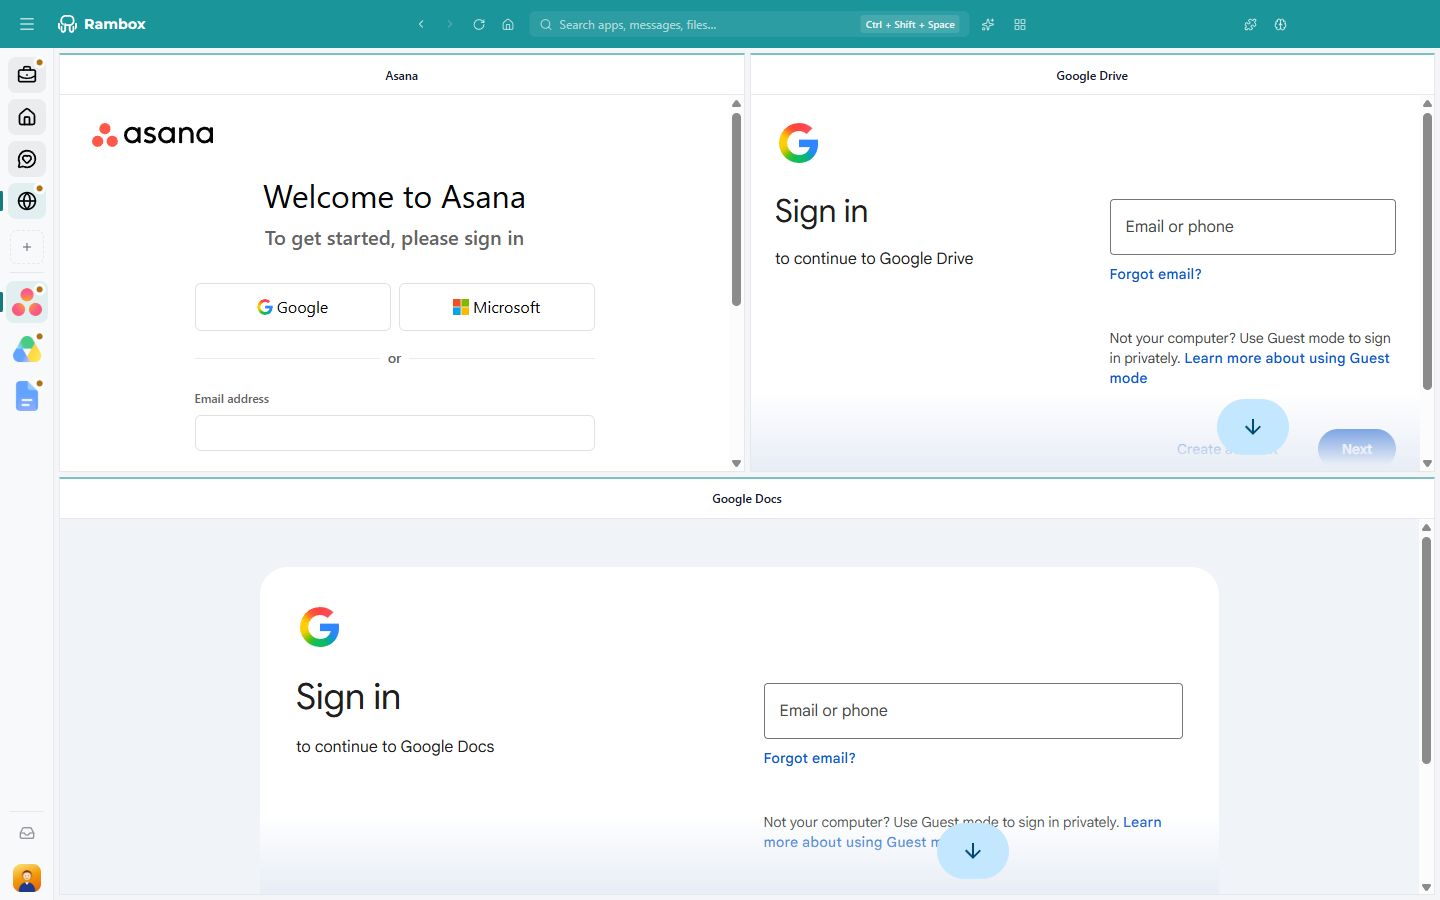
Create a Tiles workspace
The layout is chosen when you create the workspace, and it can't be changed afterwards.
- In the sidebar, click the + button (tooltip Add workspace).
- In the New workspace panel, give the workspace a Name.
- Under Layout, pick one of the four Tiles presets (any option except the first one, which is the normal one-app-at-a-time layout):
- two tiles on top and one below;
- three columns;
- two columns, with the left one split in two;
- two rows.
- Click Add.

The new workspace opens with its empty tiles, ready for apps. The rest of the workspace settings (icon, work hours, notifications…) work the same as in any workspace: see How to create and configure workspaces.
TIP
Not sure which preset to pick? It's only a starting point: you can split tiles further and drag the dividers to get the exact layout you want.
Empty tiles
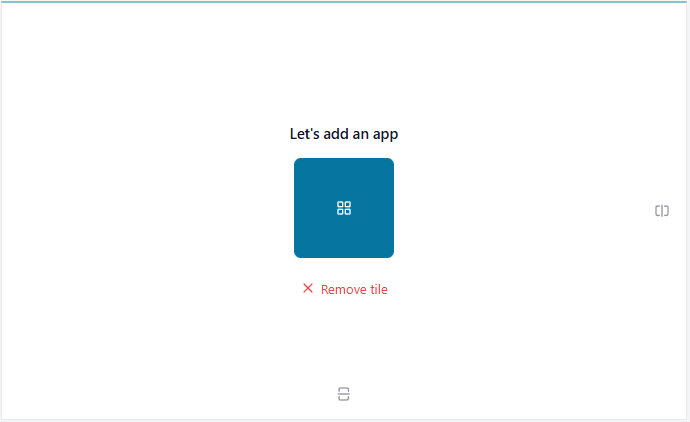
An empty tile shows Let's add an app with a big button (a grid icon). If there's more than one empty tile, the others show just a small + button. Around them you'll find:
- The big button or the + (Add app here): opens the app catalog. Pick an app, adjust its settings if you want, and click Add. The app appears in that tile.
- Split right (icon at the right edge of the tile): splits the tile in two side by side, adding an empty tile on the right.
- Split down (icon at the bottom edge of the tile): splits the tile in two, adding an empty tile below.
- Remove tile (a link under the big button, shown when you move the pointer over the tile): deletes this empty tile; the neighbouring tiles grow to fill the space.
For help with the app settings, see How to create and configure apps.
Tiles with an app
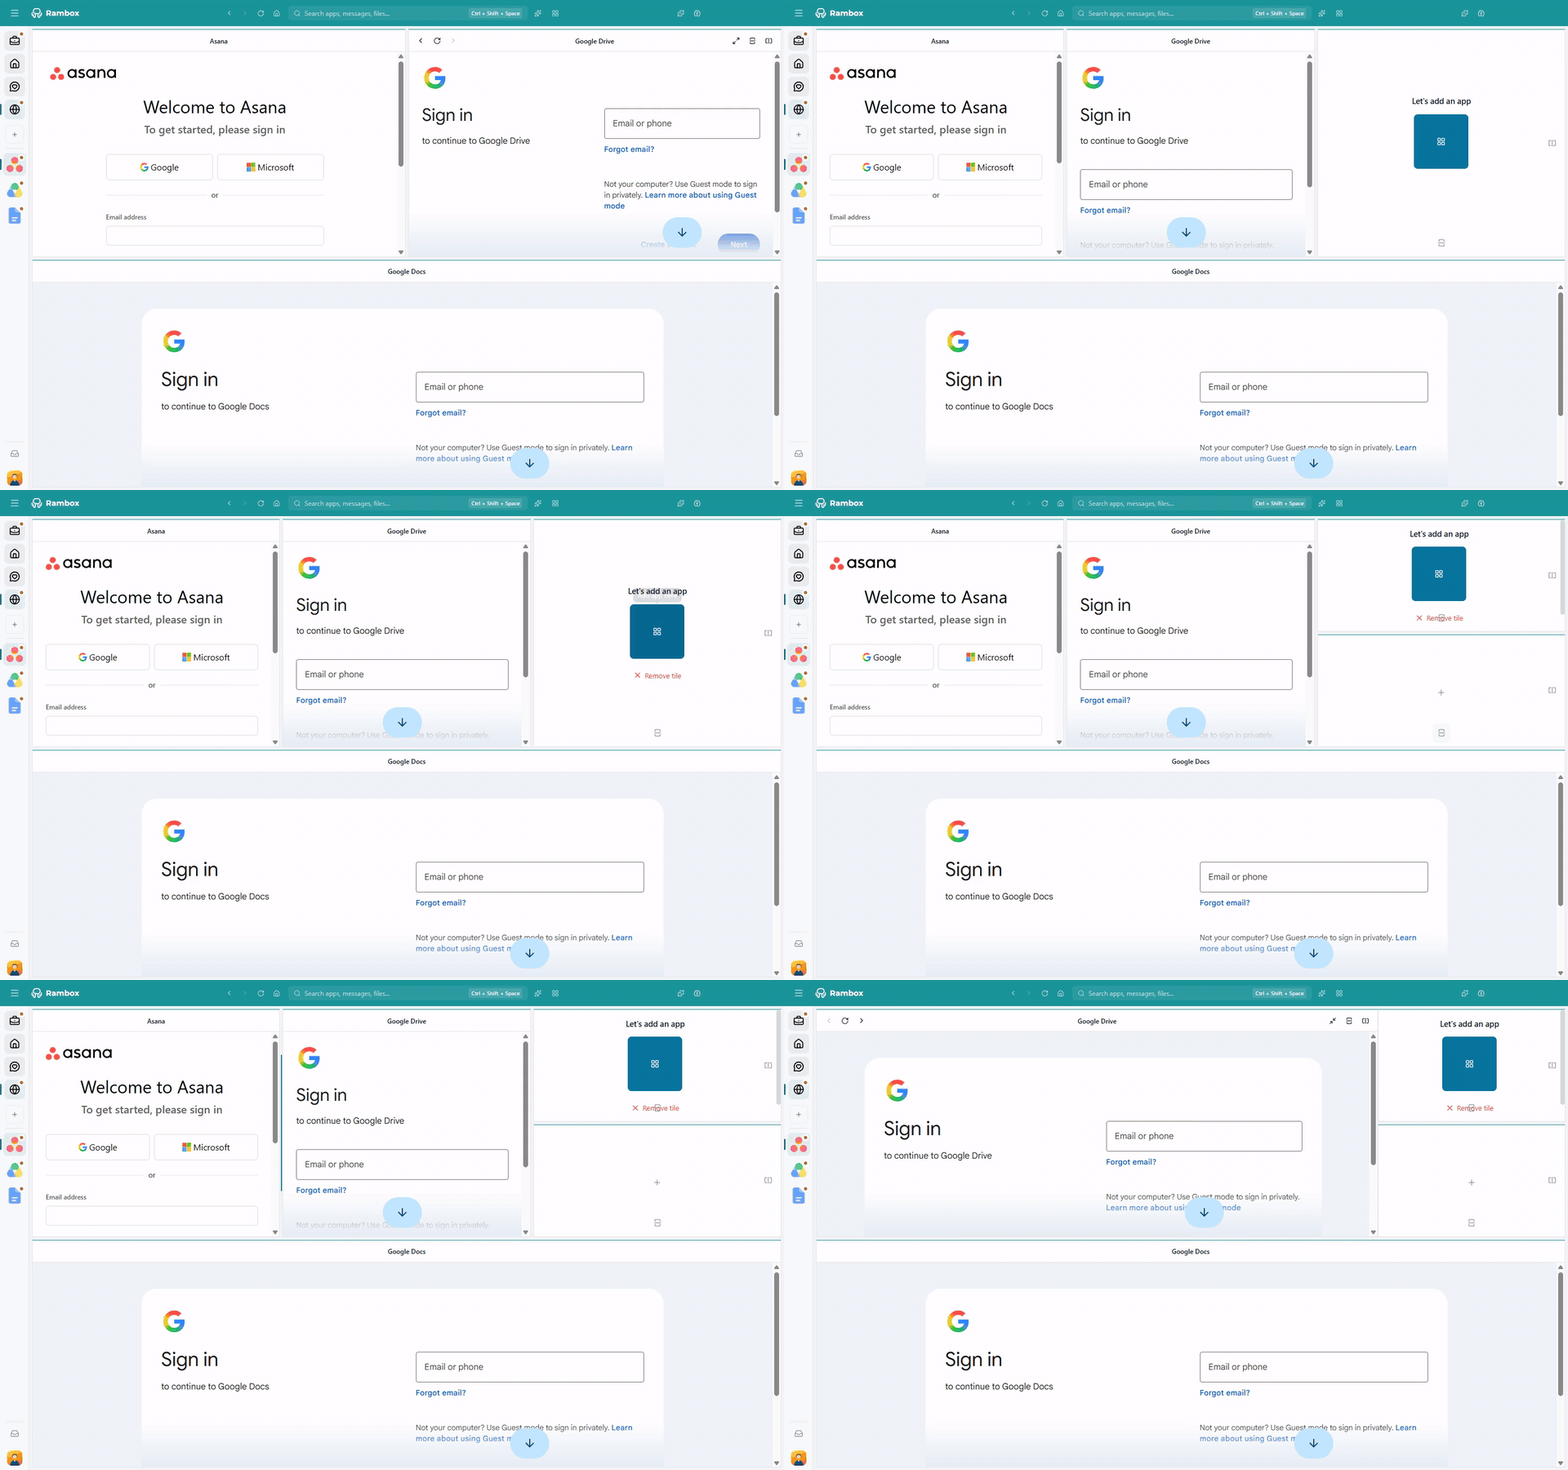
Each tile with an app has a small title bar. Its buttons show when you move the pointer over it:
- Back, Reload and Forward, to navigate inside that app;
- the app's name: double-click it to expand the tile, and double-click again to restore it;
- Expand tile / Collapse tile: makes the tile fill the whole workspace, or brings it back to its normal size;
- Split down and Split right: add a new empty tile below or to the right of this one.

To open the app's settings, right-click the app's icon in the sidebar and click the gear icon (Settings). See Apps and workspaces quick settings.
Resize tiles
Drag the line between two tiles to make one bigger and the other smaller.
Limitations
- The layout is fixed. You can't turn a normal workspace into a Tiles one, or the other way around.
- No dragging apps in or out. Apps can't be moved into a Tiles workspace or out of it by drag and drop. To have an app in a tile, add it from an empty tile's +.
- No "Add app" button in the sidebar. For Tiles workspaces, the sidebar's add-app + is hidden; add apps from the tiles instead.
- No in-app tabs. The link handling option Open all in tabs isn't available for apps in a tile; those apps use the default link handling instead. See Link handling.
- Removing an app from a tile frees the space, so you can add another app there or remove the tile.
Tips
- For narrow tiles, try the app's Force mobile rendering option (in its settings, under Advanced options, Pro): many services offer a lighter mobile version that fits better.
- Want to glance at all your apps without building a layout? Try Quick View in the titlebar. See Getting around Rambox.